


16 years ago


The mouse, one of the greatest advances in computing history, provides you with an intuitive point-and-click method for using your computer. Depending on the type of work you're doing, however, sometimes using a mouse actually slows you down. If you are a good typist, taking your hands away from the keyboard to move the mouse can use up a few seconds. Over the course of a full day, you could save several minutes by using keyboard shortcuts instead of the mouse.
You can use your keyboard instead of your mouse to do these three tasks:
• Start a programThe Start menu is great for finding programs, but its multiple levels of folders can be time consuming to navigate. If there is a program you start frequently, you should set a keyboard shortcut for it so that you can start the program without taking your hands off the keyboard.
To set a keyboard shortcut to start a program
1. | Click the Start menu, and then click All Programs. Right-click the program that you want to start with a keyboard shortcut, and then click Properties. |

2. Click in the Shortcut key box. Now press the letter on your keyboard that you want to use to start the program. Make it easy to remember—for example, press I for Microsoft Internet Explorer.
Note: You can use either uppercase or lowercase letters when creating your keyboard shortcuts—and when accessing them later. In the Shortcut key box, Microsoft Windows XP automatically adds Ctrl + Alt + before the key you pressed. When you want to start the program, hold down both the CTRL and ALT keys simultaneously, while also pressing the letter you chose. This way, your program won't start every time you type that letter.

3. Click OK.
 4. Now test your shortcut. Hold down the CTRL and ALT keys, and then press the letter you chose. If you find it difficult to hold down two keys at once, read Turn on the Sticky Keys feature. Your program should start.
 When your friends see you start up programs without touching your mouse, they just might think you have a psychic connection with your computer!
You can speed up tasks in almost any program by choosing menu items using your keyboard instead of your mouse. This operation is particularly handy when you're performing repetitive tasks.
To control menus using your keyboard
1. | With your program open, press the ALT key. Notice that one letter on each menu name is now underlined. To open the menu, press the underlined key. For example, in Internet Explorer, the View menu name shows the V underlined after you press the ALT key. To open the View menu, press the ALT key, and then press V. |

2. Now, each menu item will show one letter underlined. To access or activate the menu item you want, simply press the underlined key. For example, in Internet Explorer, after you open the View menu, the Privacy Report menu item shows the V underlined. Instead of clicking Privacy Report with your mouse, you can just press the V key.

3. You can also choose menu commands by pressing key sequences quickly, without waiting for the menus to open. For example, to quickly view a Web page's privacy report in Internet Explorer, press ALT, V, V. Similarly, to save a Web page in Internet Explorer, you would normally click the File menu, and then click Save As. To choose the same commands using your keyboard, press ALT, F, A.
If you like to keep four or five windows open while you work (or play) on your computer, you'll appreciate knowing these keyboard shortcuts. You can quickly switch between your Web browser, e-mail, instant message windows, and other programs without taking your hands off the keyboard.
| Action | Shortcut |
Minimize a window to your taskbar | ALT, SPACEBAR, N |
Maximize a window so it takes up your whole desktop | ALT, SPACEBAR, X |
Restore a window so it's visible but doesn't take up your whole desktop | ALT, SPACEBAR, R |
Close a window | ALT+F4 |
Switch to the last window you had open | ALT+TAB |
Switch to any window | Hold down the ALT key, and press TAB until the window you want is active |
Programs often start up in a "restored" state, where the window takes up only part of the screen. To maximize the window so that it takes up the entire screen, press the ALT key, press the SPACEBAR, and then press X. This will feel natural after you do it a few times, and you will feel much more efficient while using your computer.
Source : Microsoft
MULTIPLE LOGIN THROUGH FIREFOX
Multiple login in firefox (100% working)
Step 1: open system properties (by right clicking my computer), choose tab advanced, click to environment variables button. In system variables section, click new. Type this information to each textbox.
Variable name: moz_no_remote (should be all small letters)
variable value: 1
press ok to close all windows.
Step 2: open firefox icon's properties (from desktop and quick launch). Add extension -p to command line (like "c:program filesmozilla firefoxfirefox.exe" -p). Press ok.
Done!!!!!!!!!!!
While starting firefox u has to create two separate profiles of firefox so that u can login to two accounts of any (orkut, yahoo, rediff or anything else)....... for three logins create three profiles of firefox.........
Design, upload and maintain your website with this multi-award-winning Web development application with dual-mode visual (also known as WYSIWYG) and code-based (HTML, CSS and PHP) editing functionality.
With a huge range of easy to use functions, tutorials for beginners, free updates, integrated technical support contact capabilities and a dedicated Customer Benefits program - its no surprise why the Best Address HTMLEditor is fast becoming the number one choice in website development and HTML editing for both beginners and experts alike.
The huge range of professional features include:
* Templates included + download more for free
* Visual editing mode
* Coding mode with live split-screen previewing
* HTML tutorials included for beginners
* Free technical support - even from within the software itself
* FTP program included for uploading your website files (DigitalAccess FTP)
* Site project capabilities
* Spell checking
* DHTML menu editor
* HTML syntax checking
* Support for opening and saving directly from the Internet
* Image map editing
* Source code securing: helps prevent unauthorised code and design copying
* Mange tasks you need to complete with the to-do list
* Comprehensive help
* And over 70 other major features!
Download Links:
Rapidshare
http://rapidshare.com/files/79653717/BestAddress.HTML.Editor.2008.Professional.v11.0.3.rar
Size : 8 Mb
RarPass: softbase.info
15 Tips to Bring More Traffic to Your Blog
There are many factors that make blogs much better than normal WebPages including the speed at which blogs are indexed, ability to submit to blog directories & normal directories, pings and track backs. All these little things can help drive more traffic to blogs. Here are 15 popular techniques you can use:
1. Create at least four keyword posts per day. Most of the top blogs such as Boing Boing, Daily Kos, and Instapundit (with literally tens of thousands of visitors per day) publish an average of 30 small 100-150 word posts per day according to "Secrets of the A-list Bloggers: Lots of Short Posts" by TNL.net
2. Submit to My Yahoo! When you submit your own RSS to My Yahoo it is indexed by Yahoo.
3. Submit to Google's Reader. When you submit your own blog RSS to Google's Reader the Google Blog Search will index your site.
4. Add a relevant link directory to your blog and trade links like a demon possessed! Although it may take more time than simply submitting to a search engine one time, this method is perhaps the best way to drive traffic to your site. Use software such as Zeus to speed up the link trading process.
5. Use ping sites like ping-o-matic. Ping your site every time you add a new post.
6. Submit your blog to traditional search engines such as AltaVista, and MSN.
7. Submit your blog to traditional directories such as DMOZ. Directories (particularly DMOZ) increase relevance with Google. DMOZ is very picky, but what do you have to lose by trying?
8. Submit to as many RSS Directories and Search Engines as possible. This is a simple but repetitive process that can be done with software such as RSS SUBMIT.
9. Comment on other blogs. Do not just leave short, lazy comments like "I agree." Leave well thought out replies that will force readers to wonder "who wrote this?"
10. Use track backs. If there is a blog that you refer to or quote and it is highly relevant to your subject, leave a track back. It increases your link popularity and may even score a few interested readers from the linked site.
11. Go offline. Use newspaper ads, public bulletin boards, business cards, even stickers to let as many people as possible know your blog exists.
12. Add a link to your blog in your e-mail signature block.
13. Use Groups (Usenet). Find a relevant group on Google groups, Yahoo groups, MSN groups or any of the thousands of other FREE group services and find like minded people and talk with them. Make sure to use your blog URL like it is your name.
14. Use Forums. Forums are one of the best places to go for advice. Go to forums and find problems to solve. Make sure you leave your blog name, but be tactful about it; some forums get annoyed with those who selfishly drop a few links to their own site and leave.
15. Tag your website. Tagging is a new idea that has erupted across the web. Sites like Del.icio.us, Technorati and many others have a social feature that allows you to place your article under keywords or "tags" that everyone interested in that tag can see.


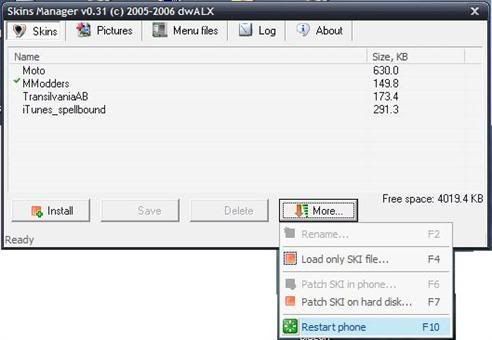
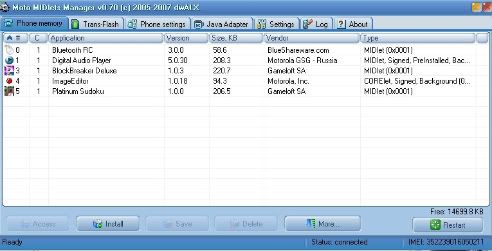
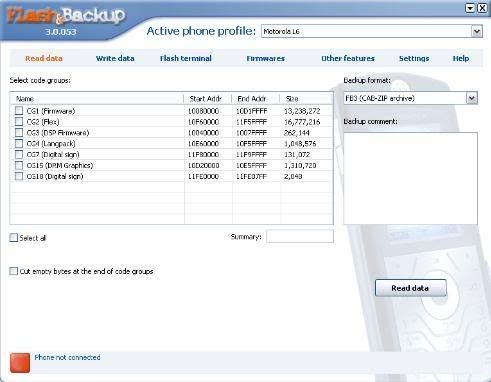
MotoKit

THE all-in-wonder phone editor! Advanced Users ONLY! Very powerful software so BE CAREFUL.
Also has some Scripting options, though the Language barrier has not been fully breached yet and some features are hard to use and understand as a result. We wait in hopeful anticipation for a new release!
Excellent Software system! Includes many advanced features on a remarkably modular engine. BEWARE though, this software has been know to have a few bugs, so BACK IT UP! if you forget to, see if we have a flex/backup that you can restore your phone with.


Level 1&2 Authorized
Version 1.2
RSD Lite
User Guide
2
Level 1&2 Authorized
Version 1.1
RSD Lite User Guide
INDEX
INTRODUCTION 3
SYSTEM REQUIREMENTS 4
HARDWARE SETUP 5
INSTALLATION OF USB DRIVERS 6
DESCRIPTIONS OF FILES NEEDED 7
FLASHING PROCEDURE 8
FLEXING PROCEDURE 10
3
Level 1&2 Authorized
Version 1.1
RSD Lite User Guide
INTRODUCTION
RSD Lite is used for software upgrade (flashing) and feature
programming (flexing) Motorola products. It replaces PST Tool.
The latest version of RSD Lite and Flash & Flex files may be
downloaded from MSSS.
RSD Lite also supports software upgrading of several phones at the
same time, called Multiflash. Multiflash support up to 127 phones by
using an external USB hub which reduces the time to upgrade phones
considerably.
4
Level 1&2 Authorized
Version 1.1
RSD Lite User Guide
SYSTEM REQUIREMENTS
REQUIREMENTS:
• Window 2000 SP2 or higher or Windows XP SP1 or higher
• Type A USB 1.1 compliant Port(s)
• 128MB Ram
• 500MHz Pentium III Processor
• 50MB available disk space
• Mouse or equivalent pointing device
• CD ROM Drive
• VGA Graphics
• USB Interface Cable
• USB 1.1 compliant 7 port hub
5
Level 1&2 Authorized
Version 1.1
RSD Lite User Guide
HARDWARE SETUP
When using RSD Lite on Windows 2000 or Windows XP the port
numbers assigned to the unit will not correspond to the port number of
the hub or host controller. In order to achieve correlation between the
unit and the port number displayed please follow these directions:
• Connect U1 directly to USB port 1 on the PC
• Connect the USB HUB to USB port 2 on the PC
• Connect U2 to USB port 1 on the USB HUB
• Connect U3 to USB port 2 on the USB HUB. Continue sequentially
until all units are connected
• Use a fully charged battery to power U1 to U8
• A travel charger may also be connected to each phone to secure the
battery voltage level
U2 U3 U4 U5 U6 U7 U8 U1
1 2 3 4 5 6 7
USB HUB
USB
USB
PC
6
Level 1&2 Authorized
Version 1.1
RSD Lite User Guide
INSTALLATION OF USB DRIVERS
Every time a new phone model is connected, 6-8 different USB drivers
must be installed for each USB port to be used. Use one phone to
install all the drivers for each UBS port, one by one.
1. Start up RSD Lite
2. Connect the phone to USB port 1 on the PC and start it up
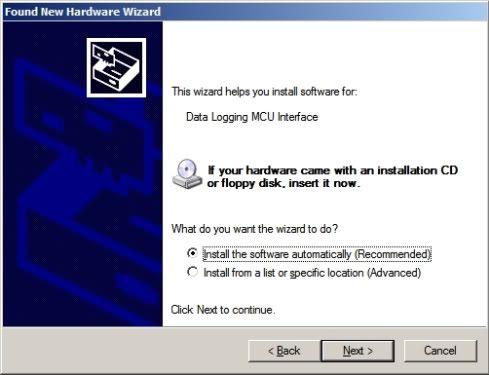
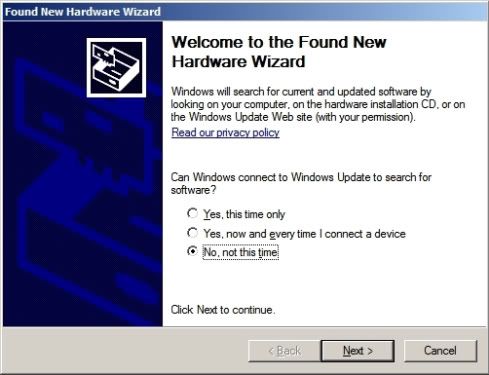
3. The Found New Hardware Wizard will start up. Follow the on-screen
instructions to install the drivers
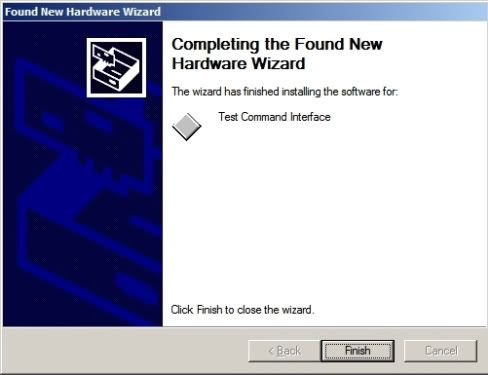
4. You will have to disconnect and connect the phone several times to
make sure all drivers are installed.
5. Use the Device Manager to make sure the phone is detected
correctly and all drivers are installed
6. When all drivers are installed and the phone is connected in normal
standby mode you will see 3 different profiles in the Device
Manager as shown in the picture below
7. When all drivers have been installed for USB port 1 on the PC, then
connect the phone to USB port 1 on the USB hub and start over
from step 3. Then do the same for USB port 2-7 on the USB hub
7
Level 1&2 Authorized
Version 1.1
RSD Lite User Guide
DESCRIPTIONS OF FILES NEEDED
FLASH FILES
To upgrade a Motorola phone, only one file (1FF) is needed. The 1FF
file includes: Core software, Language pack, Java pack and Flex file. In
some cases the different files need to be flashed separately.
The file format for Flash Files is SHX.
FLEX FILES
Usually it is not needed to flex the phone after flashing with a 1FF file
(see above). If a flexing is needed it shall be done after the flashing
procedure in order to activate the correct settings. The Flex File to use
is selected by the package number of the phone.
The file format for Flex Files is HS.
8
Level 1&2 Authorized
Version 1.1
RSD Lite User Guide
FLASHING PROCEDURE
1. Start up RSD Lite
2. Connect the phone to the PC via the USB flash cable, use a fully
charged battery to power the phone
3. Start up the phone, a Motorola USB device shall appear in the
device window
4. Click Browse […] and select the Flash file (SHX format) to use. The
File properties window in the upper right will show the file
information.
5. Mark the phone in the Device window and the phone information
will be displayed in the upper left Device properties window
9
Level 1&2 Authorized
Version 1.1
RSD Lite User Guide
6. Click Start
7. Upon completion the result column will display whether the
operation passed or failed and the phone will power down
8. Start up the phone and perform a Master Reset / Master Clear
10
Level 1&2 Authorized
Version 1.1
RSD Lite User Guide
FLEXING PROCEDURE
1. Start up RSD Lite
2. Connect the phone to the PC via the USB flash cable, use a fully
charged battery to power the phone
3. Start up the phone, a Motorola USB device shall appear in the
device window
4. Click Browse […] and select the Flex file (HS format) to use. The
File properties window in the upper right will show the file
information.
5. Mark the phone in the Device window and the phone information
will be displayed in the upper left Device properties window
11
Level 1&2 Authorized
Version 1.1
RSD Lite User Guide
6. Click Start
Upon completion the result column will display whether the operation
passed or failed and the phone will power down
7. Start up the phone and perform a Master Reset / Master Clear


Section -1 : Answer each question in about 500 words.
1. What do you understand by the term faudalism? Do you think the western Europe model of feudalism is appliacble to India?
Ans:- Before the rise of national states in Western Europe, the people lived under a system called feudalism. This was a social system of rights and obligations based on land ownership patterns.
Each small district was ruled by a duke, count, or other noble. The noble's power was based on the land he held in feud. This peculiar system of landholding determined the pattern of government. It also gave rise to fortified castles, knights in armor, and chivalry. The term "feudalism" therefore describes an entire way of life.
The system of feudalism was established gradually, between the 8th and 11th centuries. France was the land of its earliest and most complete development, but in some form or other it was found in all the countries of Western Europe. It flourished especially from the 11th to the end of the 13th century. There are survivals of feudalism in the laws and social usages of modern European countries.
No,it is highly improbable that European feudalism is applicable in India.
Feudalism had begun as a contract, the exchange of land tenure for military service. Over time, as lords could no longer provide new lands to their vassals, nor enforce their right to reassign lands which had become de facto hereditary property, feudalism became less tenable as a working relationship. By the thirteenth century, Europe's economy was involved in a transformation from a mostly agrarian system to one that was increasingly money-based and mixed. The Hundred Year's War instigated this gradual transformation as soldier's pay became amounts of gold instead of land. Therefore, it was much easier for a monarch to pay low-class citizens in mineral wealth, and many more were recruited and trained, putting more gold into circulation, thus undermining the land-based feudalism. Land ownership was still an important source of income, and still defined social status, but even wealthy nobles wanted more liquid assets, whether for luxury goods or to provide for wars. This corruption of the form is often referred to as "bastard feudalism". A noble vassal was expected to deal with most local issues and could not always expect help from a distant king. The nobles were independent and often unwilling to cooperate for a greater cause (military service). By the end of the Middle Ages, the kings were seeking a way to become independent of willful nobles, especially for military support. The kings first hired mercenaries and later created standing national armies.
The Black Death of the fourteenth century devasted Europe's population but also destabilised the economic basis of society. For instance, in England, the villains were much more likely to leave the manorial territory - seeking better paid work in towns struck by a labour shortage, while the crown responded to the economic crisis by imposing a poll tax. The resulting social crisis manifested itself in the peasants' revolt.
Historian J. J. Bagley notes that the fourteenth century
"marked the end of the true feudal age and began paving the way for strong monarchies, nation states, and national wars of the sixteenth century. Much fourteenth century
2. Discuss the main threats to the eco-system.
Ans:-
There are broadly activities of man which are causing considerable damage to the eco-system.
These are -
(1) The destruction of tropical rain forests.
(2) Establishment of petro-chemical industries with their production of poisonous gases, chemicals and other toxic substances.
(3) Generation of nuclear power and
(4) Excessive, militarism.
The long-term solution of these dangers is to look for self-sustaining life support systems.
(5) Ecological crises will take place. Ecological crises, essentially refers to the disruption in the natural balance between living organisms and their surrounding, by the activities of man. Man has acted as an interventionist, so the say, and disrupted the surrounding. This had created q crises.
(6) If ecological crisis will takes place then firsly there is the danger from poisonous chemicals, and pesticide, secondly there is danger from cereal is called the 'Green House Effect'. This leading to increasing a accumulation of carbon dioxide in the atmosphere.
(7) Environment, degration and environmental aduteration would take place in very lhigh manner.
Section 2 : Answer each question in about 250 words.
3. What is meant by 'Market Failure'? Briefly discuss the major weaknesses of the free market economy.
Ans:- A county's economic health and property depend on health of its market. The market is controlled by what is controlled ny what is called 'market Forces' When these forces work in unison, in harmony and in the interest of people and the nation, the market remains healthy. The demand and supply of all commodies match as closely as possi8ble and keep the prices steady. However, there do come times when total market failuare takes places.
Market Failuare is a situation when industries get closed. Already produced good is stored, the demand of the commodities almost decreased, share markets are also closed, the problem of unemployement increased in the country and the economy became totally disturbed. In 1992 that type of market failure had takes place.
FreeMarket:- This is the type of market in which commodities are sold are purchased without the interterms. They are free to produce any amount of the product and at any price.
There is no interference of Govt. in free market so the problem of black marketing takes place. Capital class exploit the weaker section so the capital class rich day per day & the poor class weak play per day, purchasing power of customer reduced day by day because of higher prices. Producers run the market as per their desire for earing maximum profit. The buseness of money lords grow and the economy weak day by day. Corruption less supply of product in the market, maximum profit, monopoly are the main wakness of the free market economy.
4. Describe the role of intellectuals up to the end of the 19th century India.
Ans:- If we don't look this aspect from a preoccupied thought, then we will find that the role of intellectuals is immense.Right from the time of Raja Ram Mohun Roy, who seriously pursued Sati abolition cause to Dada Bhai Nouroji who put forward the drain theory. In the middle of the nineteenth century, intellectuals played a key role for the cause of Indigo cultivators during the indigo revolution of Bengal in 1859-60, by writing petitions and filing court cases and filling forms for the illiterate cultivators.
one can find numerous such incidents. The success these intellectuals managed to get, is also behind our present faith fro Right to information and Indian way of doing things through petitions
5. Why do we require an independent judiciary in a federal setup?
Ans:- The guiding principle behind federalism is independence of government branches. This allows no single branch to decide the direction of the country, and with checks and balances there is a greater chance that the rights of the individual, especially those who are in the minority, will be protected from the will of the majority. An independent judiciary is vital to such a set up because it takes the laws created by the legislature and interprets them against the legal backdrop of the Constitution, without being swayed towards an interpretation favored by another branch. Once the judiciary becomes a pawn of another government branch, the delicate balance created by a three-branch government fails, and a small group can impose its will over the majority. The most important function of the judiciary is to ensure that the rights guaranteed by the nation's constitution are enforced. Once I cheat by having someone else do my homework, the whole system falls. An independent judiciary prevents a government from using the important matters of the day to justify illegal and immoral actions against the minority by passing and enforcing laws contrary to the ideals on which a nation is founded.
6. What do you understand by "urbanism"? Discuss its impact.
Definition: Urbanism is the word used by archaeologists to describe the process that drives people to live in cities. Cities are defined by their size (generally greater than 5,000 people), and the existence of a series of complexity traits, including such things as a central administration or government, and the segregation of people by class and/or occupation.
We assume, but don't really have a way of knowing, that people congregated together for protection, or to facilitate public projects like irrigation systems or the construction of large buildings. Living in clumps has problems that must be resolved for cities to continue, including the transport of food produced elsewhere into the city limits, and rubbish and sanitation transported outside.
Question 3 : Answer in about 100 words each.
7. Write short notes on any two of the following:
i) The Enclosure Movement
The Enclosure movement in
i) The first wave came in the 16th and 17th centuries. During this period small peasants and tenants were evicted from land by land lords. The reason was that the latter had enclosed or fenced in large plots of land for breeding sheep to get wool for the expanding woollen textiles market.
ii) The second wave came in the 18th and 19th centuries. The enclosures began to be macle to improve cultivate land as a business proposition.
In the latter development the land owner evicted the peasants by special licence from the king or the private Acts of Parliaments (there are 2700 such Acts in 1700-1844) and other methods. As a result in 1883 in
ii)Slavery in ancient India.
iii) The process of Sanskritisation
Sanskrit is the mother language of almost all Indian languages and also some out of Indian languages like Bhasha of Indonesia.
Sanskrit is the oldest language in the world and also richest in classic literature. However it was neglected in the last 1000 years of alien rule.
The process of sanskritisation means giving again the status of eminence to sanskrit as it had always enjoyed. The students are now encouraged to take sanskrit as a subject from early days. In every state a sanskrit academy has been set up special sanskrit Universities, like Lal Bahadur Shastri Sanskrit Universities have been set up. Government has sponsered correspondence courses of sanskrit learning. Also, there are regular news broadcasting radio and telecast on TV, some times also have been produced in sanskrit.
Thus sanskritisation is in the process in education, radio, TV, films, science, technology Government offices etc. actively supported by the Government.
iv) Communal award of 1932


