0
Posted on 2:58 AM by Hamid and filed under


All that hard work sending out resumes has finally paid off and you've been called in for a face-to-face job interview.

Congratulations!

This is an important step in your job search. It's also your only chance to make a lasting first impression.
On the day of your interview, sweating palms and stomach butterflies are to be expected. But you can reduce your stress level by knowing some common mistakes that interviewees make when meeting with potential employers -- and avoiding them.


Here are 10 of the most common mistakes people make on job interviews:


1. Not taking the interview seriously: Don't make the mistake of thinking the interview is just a formality. Even if all the preliminaries have gone well, don't be cavalier and start imagining how you'll start spending your new salary. The biggest error you can make is to assume that, because you've gotten this far, the job is in the bag.


2. Dressing down: How you present yourself during your initial meeting with a potential employer is very important, and your physical appearance can speak volumes to someone who is meeting you for the first time. Even if you know that the firm allows employees to wear jeans, don't sabotage yourself by showing up to the interview in casual clothing. Err on the side of conservative and show up in neat, professional clothing, preferably a business suit.


3. Not showing why you're the best choice: Be familiar with the job description of the position you're interviewing for so you can illustrate how your experience, abilities, and strengths are in line with the company's needs. Many potential employers want to know why they should hire you specifically. Make it clear to them.


4. Being too modest: Failing to talk yourself up during an interview is one of the most self-defeating mistakes you can make. This is not the time for humility, so sing your praises! Don't be afraid to talk up everything you've accomplished, whether in school or in previous companies. This is your time to shine.


5. Talking too much: Be careful not to talk over the interviewer. This meeting should be a two-way conversation, and many interviewees cover up their nervousness by blathering on. Sit calmly and listen carefully, answering questions thoughtfully.


6. Focusing on the funds: Don't start talking about money too soon into the interview. Focusing on your salary requirements and previous salary history right off the bat may cause you to reveal too much. While the topic of salary will certainly come up, follow the interviewer' s lead. He or she may be saving that topic for a later conversation.


7. Trash talking: Even if you hated your former boss or felt you were treated unfairly by your previous employer, a job interview is not the place to launch into a litany of complaints. Don't go there. If you were laid off or fired from a previous position, be prepared with an explanation that puts a positive spin on the circumstances.


8. Failing to ask questions: Your résumé may be impressive on paper, but employers also appreciate a candidate who can ask several intelligent questions during an interview. Prepare at least 3 or 4 questions in advance to ask the interviewer. Interviews are an exchange of information, and not having questions to ask can reveal a lack of preparation.


9. Lack of enthusiasm: This is your first and sometimes only chance to showcase your personality. Don't walk in announcing how you're having a bad day. Be polite and upbeat. Show your enthusiasm for both the job and the opportunity to interview for it. And don't forget to thank the person at the end of the interview!


10. Forgetting the follow-up: Make sure to send a handwritten thank-you note or polite email to the interviewer expressing gratitude for his or her time and consideration.. And while you don't want to start calling the company on a daily basis, a phone call checking in a week after the interview is perfectly acceptable.

Stumble Upon Toolbar
0
Posted on 7:35 PM by Hamid and filed under

Google will have a bazillion different listing s for this, all complicated processes. Maybe i just got lucky with this one, but try it first!

My problem was an install from windows update the often gets corrupted, xml4. Whenever I shut down my computer, Windows said it is installing update 1 of 1. It toggled between the message of “Installing update 1 of 1″ and a don’t turn off the computer, it would shut down by itself. But it will stay on that until I force shut down, and still be there whenever I want to restart or shutdown. If this is you:

      1. Disable automatic updates > more on that
      2. Download “msxml4-KB936181-enu.exe” from the Microsoft site, not Windows Update.
      3. Run the program > Remove
      4. Reboot
      5. Run the program again > Install
      6. Turn on Automatic Updates. I left automatic updates OFF, but the problem should be fixed so you shouldn’t have to.
Stumble Upon Toolbar
0
Posted on 1:32 AM by Hamid and filed under

dhe orissa e-Admission declared College wise 1st Selection List at dheorissa.in. DHE Orissa 11th Std 1st Selection List at www.dheorissa.in DHE Orissa Selection List 2009 at www.dheorissa.in
Department of Higher Education Orissa 11th Standard First Selection List 2009 at www.dheorissa.in

Stumble Upon Toolbar
0
Posted on 3:46 PM by Hamid and filed under

Visual Studio Recent Project List

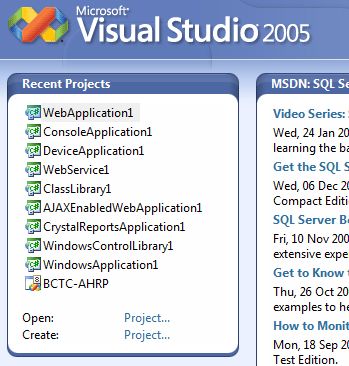
Sometimes we create projects just for experimentation and then soon after we are done with the experimentation, we delete the project from the file system in order not to clutter up our working environment. But what about Visual Studio? The Start page of Visual Studio has a list of recent projects and it is meant for a convenient feature. But for the experimental projects that no longer exist, that list does not really reflect the reality.

To remove the projects from the list, follow these steps:

  1. Close Visual Studio if it is running.
  2. Start the Registry Editor (run regedit).


  3. Navigate to this registry key:
    HKEY_CURRENT_USER\Software\Microsoft\VisualStudio\8.0\ProjectMRUList


  4. Then delete the key that has the project you do not want to keep in the list.

A little note to keep in mind is that the list only lists consecutive items starting File1. So if in the above list I deleted File6, then only projects corresponding to File1 to File5 will be displayed in the recent project list. File7 and above will not be displayed. If in case you like File7 and above to be displayed, you will need to rename one of the keys so that they form a consecutive numbered list.

Stumble Upon Toolbar
0
Posted on 11:28 AM by Hamid and filed under

Some people prefer not to display the label count in their blogs as it looks a bit unprofessional. Lets say if you have a label 'Funny sms' with 50 label count and another one ' Good morning sms' with 2 as label count... less people will show interest on clicking the second one.
hiding blogger label count
So, lets see how to hide or remove the Label count in your blogger blog(s)...

1. Sign into Blogger dashboard » Layout » Edit html
Tick the expand widget templates and remove this line from the template..

<span dir='ltr'>(<data:label.count/>)</span>

removing blogger label count
2. Save the Changes and done!

Stumble Upon Toolbar
0
Posted on 3:01 AM by Hamid and filed under
Hamid - World
Stumble Upon Toolbar
0
Posted on 7:16 PM by Hamid and filed under


Microsoft Access 2000
Introduction into Microsoft Access
Starting Up Microsoft Access
Creating New, and Opening Existing Databases
Creating a database using a wizard
Creating a database without using a wizard
Tables - What they are and how they work
    Create a table from scratch in Design view
    Primary Keys
    Switching Views
    Entering Data
    Manipulating Data
    Advanced Table Feature Examples
Relationships - How to link multiple tables together
Forms - What they are and how they work
    Creating A Form Using A Wizard
Reports - What they are and how they work
    Creating A Report Using A Wizard
    Creating Mail Merge Labels using aWizard


Microsoft Access Description
Back to top

Starting Microsoft Access
Back to top

Creating New, and Opening Existing Databases

Creating A Database
The above picture gives you the option to:

Back to top

Create a database using the Database Wizard

  1. When Microsoft Access first starts up, a dialog box is automatically displayed with options to create a new database or open an existing one. If this dialog box is displayed, click Access Database Wizards, pages, and projects and then click OK.

    If you have already opened a database or closed the dialog box that displays when Microsoft Access starts up, click New Database on the toolbar.

  2. On the Databases tab, double-click the icon for the kind of database you want to create.

  3. Specify a name and location for the database.

  4. Click Create to start defining your new database


Back to top

Create a database without using the Database Wizard

  1. When Microsoft Access first starts up, a dialog box is automatically displayed with options to create a new database or open an existing one. If this dialog box is displayed, click Blank Access Database, and then click OK.

    If you have already opened a database or closed the dialog box that displays when Microsoft Access starts up, click New Database on the toolbar, and then double-click the Blank Database icon on the General tab.

  2. Specify a name and location for the database and click Create. (Below is the screen that shows up following this step)

    Database Window


Back to top

Tables

A table is a collection of data about a specific topic, such as students or contacts. Using a separate table for each topic means that you store that data only once, which makes your database more efficient, and reduces data-entry errors.


Tables organize data into columns (called fields) and rows (called records).
Table Output

Back to top

Create a Table from scratch in Design view
  1. If you haven't already done so, switch to the Database Window You can press F11 to switch to the Database window from any other window.
    Database Window
  2. Double-Click on "Create table in Design view".
    (DESIGN VIEW)
    Design View
  3. Define each of the fields in your table.

Back to top

Primary Key

Back to top

Switching Views
Datasheet View Design View
Datasheet View Button
Displays the view, which allows you to enter raw data into your database table.
Design View Button
Displays the view, which allows you to enter fields, data-types, and descriptions into your database table.

Back to top

Entering Data

Back to top

Manipulating Data

Back to top

Advanced Table Features w/Microsoft Access

Back to top

Relationships

After you've set up multiple tables in your Microsoft Access database, you need a way of telling Access how to bring that information back together again. The first step in this process is to define relationships between your tables. After you've done that, you can create queries, forms, and reports to display information from several tables at once.

A relationship works by matching data in key fields - usually a field with the same name in both tables. In most cases, these matching fields are the primary key from one table, which provides a unique identifier for each record, and a foreign key in the other table. For example, teachers can be associated with the students they're responsible for by creating a relationship between the teacher's table and the student's table using the TeacherID fields.

Having met the criteria above, follow these steps for creating relationships between tables.

  1. In the database window view, at the top, click on Tools ---> Relationships
  2. Select the Tables you want to link together, by clicking on them and selecting the Add Button
  3. Drag the primary key of the Parent table (Teacher in this case), and drop it into the same field in the Child table (Student in this case.)
    Relationships
  4. Select Enforce Referential Integrity
    Referential Integrity
    • When the Cascade Update Related Fields check box is set, changing a primary key value in the primary table automatically updates the matching value in all related records.
    • When the Cascade Delete Related Records check box is set, deleting a record in the primary table deletes any related records in the related table
  5. Click Create and Save the Relationship

Back to top

Forms

A form is nothing more than a graphical representation of a table. You can add, update, delete records in your table by using a form. NOTE: Although a form can be named different from a table, they both still manipulate the same information and the same exact data. Hence, if you change a record in a form, it will be changed in the table also.

A form is very good to use when you have numerous fields in a table. This way you can see all the fields in one screen, whereas if you were in the table view (datasheet) you would have to keep scrolling to get the field you desire.


Back to top

Create a Form using the Wizard

It is a very good idea to create a form using the wizard, unless you are an advanced user and know what you are doing. Microsoft Access does a very good job of creating a form using the wizard. The following steps are needed to create a basic form:

  1. Switch to the Database Window. You can do this by pressing F11 on the keyboard.
  2. Click on the Forms button under Objects on the left side of screen
  3. Double click on Create Form Using Wizard
  4. On the next screen select the fields you want to view on your form. Most of the time you would select all of them.
  5. Click Next
  6. Select the layout you wish
  7. Click Next
  8. Select the style you desire...HINT: if you plan on printing your form, I suggest you use a light background to save on printer toner and ink
  9. Click Next
  10. Give you form a name, and select Open the Form and enter information
  11. Select Finish
  12. You should see your form. To adjust the design of your form, simply hit the design button (same as with the tables), and adjust your form accordingly

Back to top

Reports

A report is an effective way to present your data in a printed format. Because you have control over the size and appearance of everything on a report, you can display the information the way you want to see it.


Back to top

Create a Report using the Wizard

As with the Form, it is a very good idea to create a report using the wizard, unless you are an advanced user. Microsoft Access does a very good job using the wizard to create reports.

  1. Switch to the Database Window. You can do this by pressing F11 on the keyboard.
  2. Click on the Reports button under Objects on the left side of screen
  3. Double click on Create Report Using Wizard
  4. On the next screen select the fields you want to view on your form. Most of the time you would select all of them.
  5. Click Next
  6. Select if you would like to group your files. Keep repeating this step for as many groupings as you would like.
  7. Click Next
  8. Select the layout and the paper orientation you desire
  9. Click Next
  10. Select the style you desire...HINT: if you plan on printing your report, I suggest you use a light background to save on printer toner and ink
  11. Click Next
  12. Give you report a name, and select Preview the Report
  13. Select Finish
  14. You should see your report. To adjust the design of your report, simply hit the design button (same as with the tables), and adjust your report accordingly

Back to top

Creating Mail Merge Labels using a Wizard

Microsoft Access lets you create Mailing Labels for your database that you have. To do this do the following:

  1. Switch to the Database Window. You can do this by pressing F11 on the keyboard.
  2. Click on the Reports button under Objects on the left side of screen
  3. Click on New
    Mail Merge
  4. Select Label Wizard and the table you would like to get your information from.
    Label Wizard
  5. Click OK
  6. Select the layout of your labels
  7. Click Next
  8. Select the font size and color you want on each label
  9. Click Next
  10. Select how you want your label to look
  11. Click Next
  12. Select how you want your labels sorted
  13. Give your label report a name and preview it

Back to top

Stumble Upon Toolbar